
How to Use Reference Images in Vidu Q4 (@Image Tags Explained)
A practical guide to reference-to-video in Vidu Q4: how @Image tags work, what makes a good character, location or product image, how to keep them consistent, and three real examples with their inputs.
Reference-to-video is the most flexible way to use Vidu Q4. Instead of animating one picture, you hand the model a cast and a set (characters, locations, products, even voices) and then direct a new scene with them. Whether that works depends mostly on two things: the images you upload and how you name them in the prompt.
This guide covers both, using three clips we generated on viduq4.xyz, with the exact images that went into them.
How @Image tags work
- Upload your images in the Reference to Video workspace (up to 12 images, plus up to 3 MP3 voice clips of 3–12 seconds each).
- Each upload gets a number in the order it appears in the upload row: Image 1, Image 2, and so on. Voice clips become Audio 1, Audio 2.
- In the prompt, refer to them as @Image 1, @Audio 1. Typing @ opens a picker, and new uploads are added to the prompt as tags automatically.
- When you remove or reorder an upload, the tags in your prompt renumber to match.
The model only knows what the tags mean from what you write. "@Image 1" by itself is just a number. "@Image 1 is the cat athlete" is an instruction.
Rule 1: one image, one job
Each image should be exactly one of these:
- A character: a person, animal or mascot.
- A location: the place where the scene happens.
- A product or prop: something whose shape and text must stay exact.
Then say which is which at the start of the prompt, before any action:
@Image 2 is the diving arena. @Image 1 is the cat athlete; keep its grey long fur and red swim cap with a white stripe exactly.
Mixing jobs, like a character standing in the location you want, makes it harder for the model to tell what to keep and what to rebuild.
Example 1: a character and a location
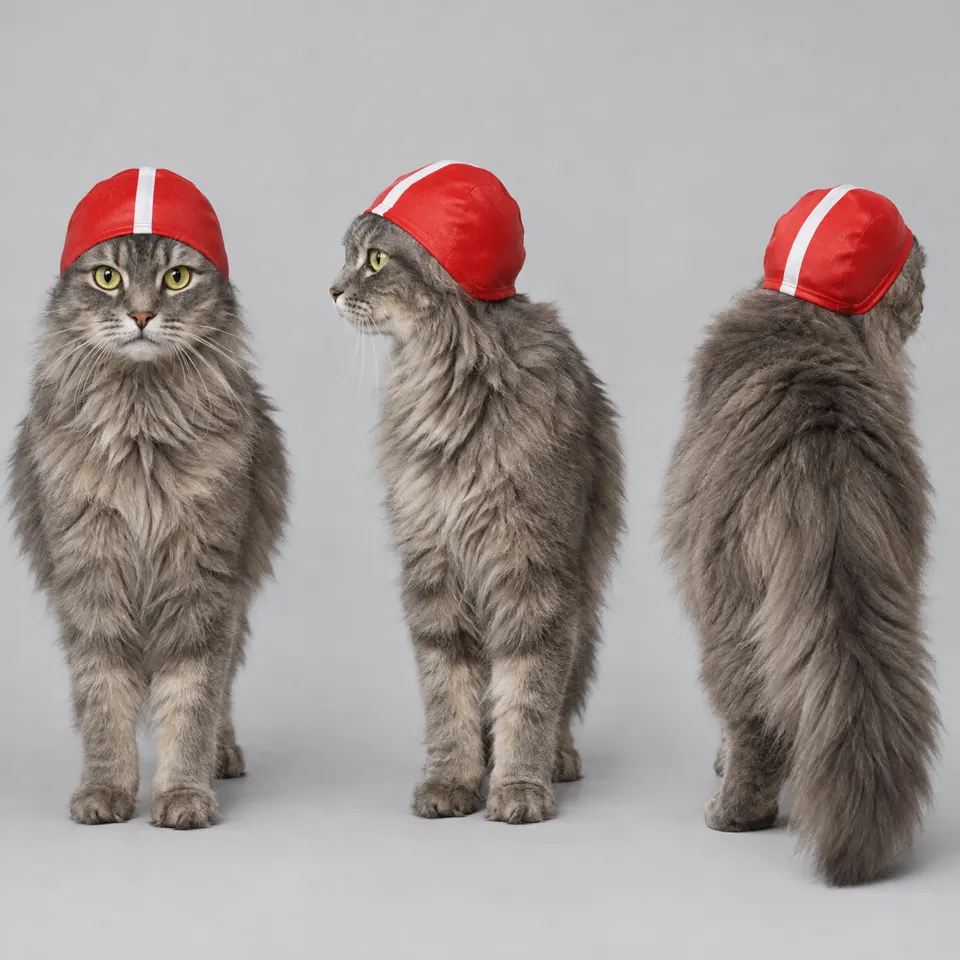
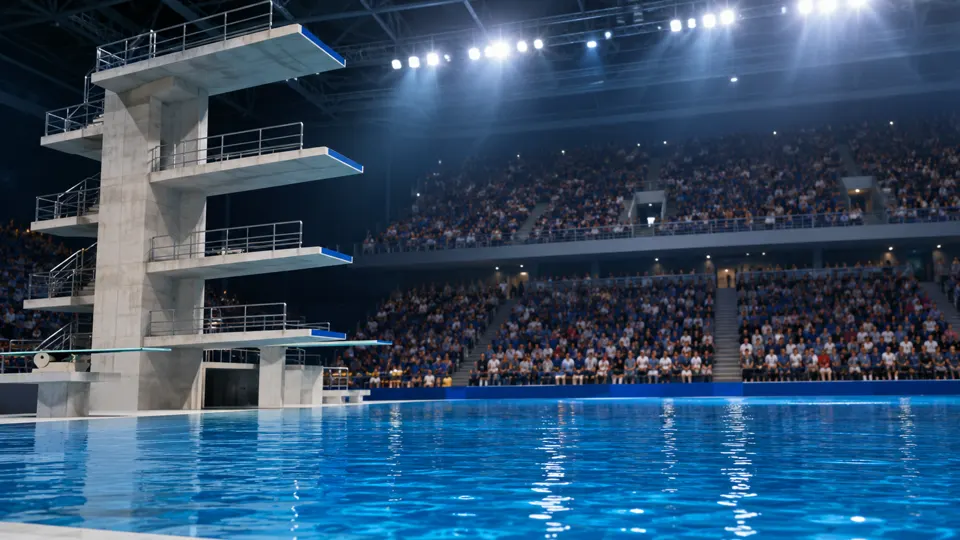
The character image is a turnaround sheet: the same cat from the front, side and back on a plain grey background. That gives the model the swim cap and fur from every angle, which matters once the camera starts moving. The arena is empty, so the model never mistakes a spectator for the athlete.
The red cap and its white stripe stay the same across all three shots, including upside down in mid-air.
Example 2: two characters and a location
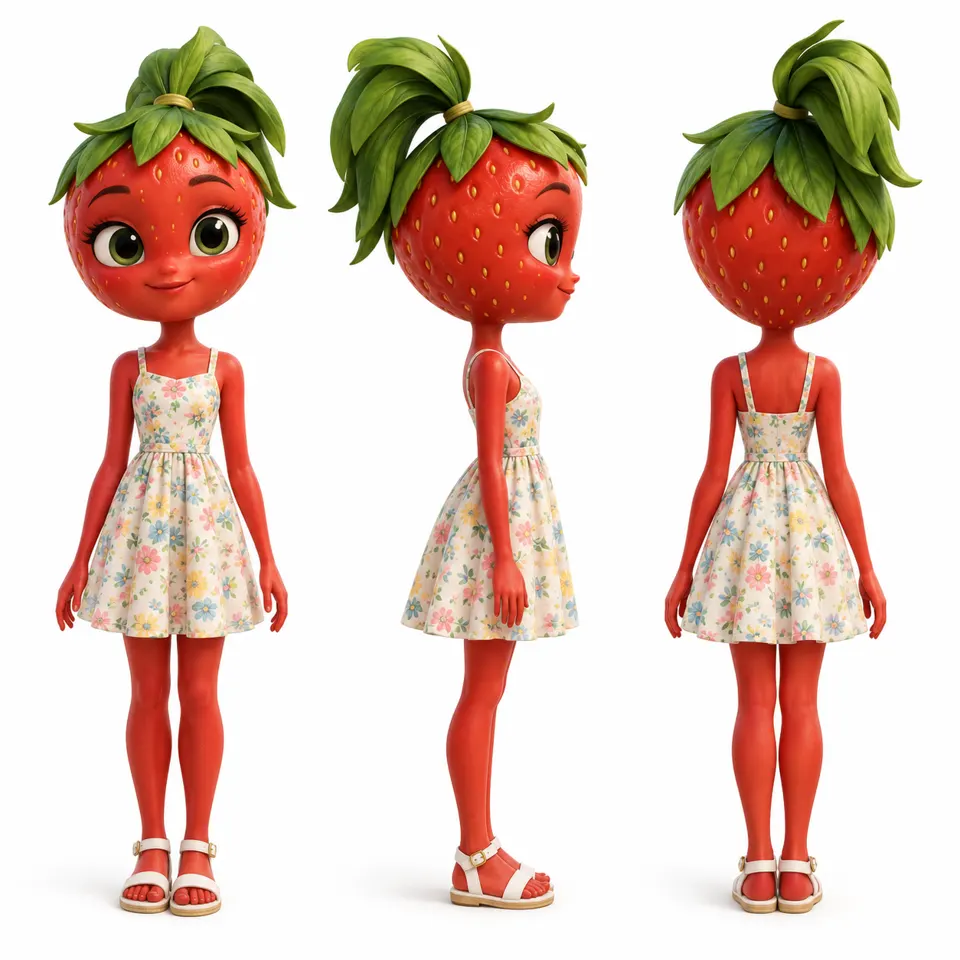
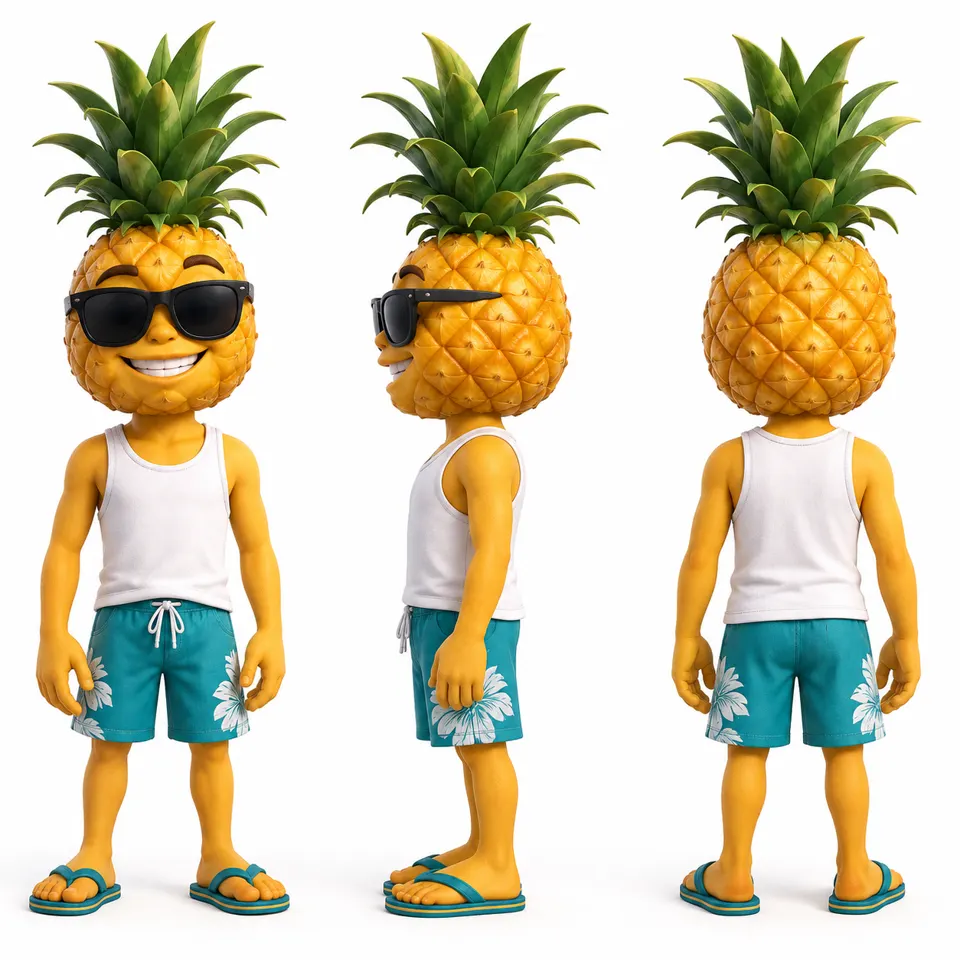

With two characters, give each one their own image and their own shot in the prompt:
Glossy stylized 3D animated comedy. @Image 3 is the location: a poolside patio at sunset. @Image 1 is the strawberry girl, @Image 2 is the pineapple guy; keep both character designs exactly as referenced, rendered in the same 3D animated style. Shot 1 (0-4s): medium shot of @Image 1, eyes watery, lip trembling, facing camera, mouth clearly visible. She says, hurt and shaky: "You said I was your only fruit." Shot 2 (4-8s): close-up of @Image 2, a sweat drop slides down his rind; he stammers, nervous: "Babe, the mango meant nothing. I swear." Fast dramatic zoom on his face at 7s. Audio: dialogue as written; a dramatic sting at 7s; pool water lapping, cicadas; soft reality-show tension synth. No violence, no text on screen.
Notice the location image is closer to a painted, realistic style than the 3D characters. The line "rendered in the same 3D animated style" tells the model which look to follow, and in our clip the patio blends in with the 3D characters.
Example 3: a product that must stay exact
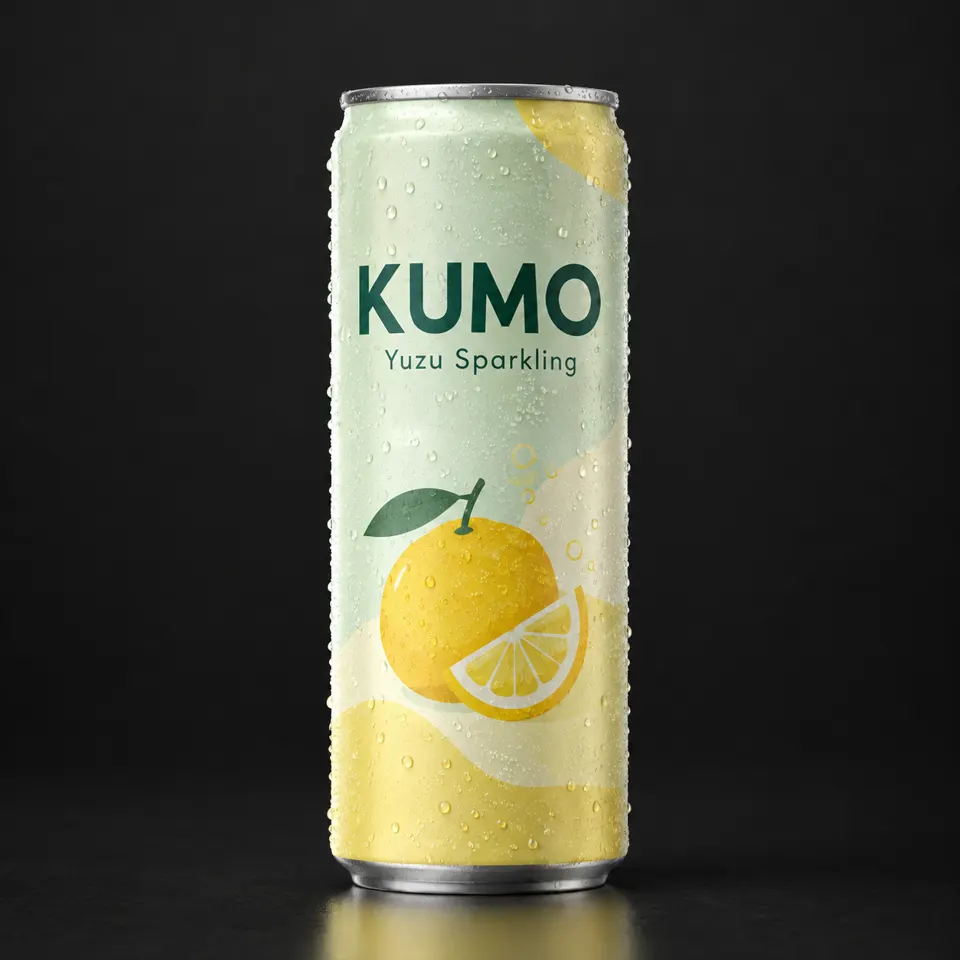
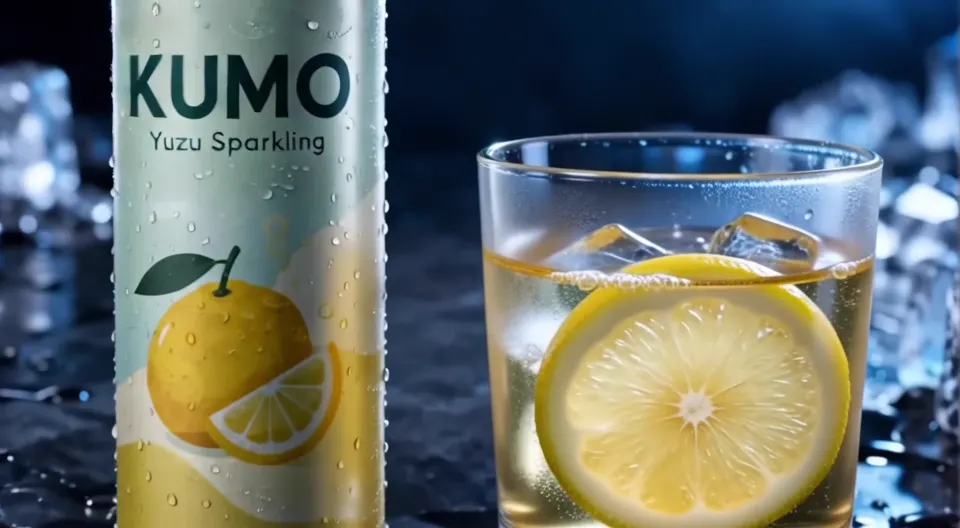
For products, use a straight-on shot on a plain background with short, large text on the label. "KUMO" and "Yuzu Sparkling" are easy to keep. A paragraph of fine print is not. Then lock it at the end of the prompt:
Keep the can label legible and identical to the reference.
What makes a good reference image
| Image type | Do | Avoid |
|---|---|---|
| Character | Turnaround sheet (front, side, back), full body, plain background, even light | Busy backgrounds, several characters in one image, heavy shadows on the face |
| Location | Empty scene with the lighting and time of day you want | People or animals in the shot, a different art style from your characters |
| Product | Straight-on shot, plain background, short and large label text | Small print, reflections hiding the label, cropped edges |
| Voice (MP3) | A clean 3–12 second clip of the voice, no music underneath | A voice you don't have permission to use |
Using a voice reference
Upload an MP3 and refer to it in the dialogue line, for example:
@Image 1 speaks with the voice of @Audio 1 and says: "Morning! Your usual oat latte is ready."
Only use your own voice, or one you have permission to use.
Common mistakes
- Uploading without naming. Every image you upload should appear in the prompt with a job.
- Two characters, one image. Split them into separate images so each gets its own tag.
- A location with people in it. The model may treat those people as part of your cast.
- Style mismatch with no instruction. If your images come from different styles, say which style the video should follow.
- Real people or real brands. Generate your own characters and products.
FAQ
How many reference images can I use? Up to 12 images and 3 voice clips per video on viduq4.xyz. For most 8-second scenes, two or three images are plenty.
Does the order of images matter? Only for numbering. Image 1 is the first image in the upload row. The roles come from your prompt, not from the order.
Can I reuse the same character across videos? Yes. Save your images as a Subject in the workspace and add them to any new prompt in one click.
Should I use reference-to-video or image-to-video? If you need the same character across several shots, use reference-to-video. If you want one exact picture brought to life, use image-to-video. See the full comparison in Image-to-Video vs Reference-to-Video in Vidu Q4.
More prompt patterns are in the Vidu Q4 prompt guide.
viduq4.xyz is an independent website and is not affiliated with Vidu or ShengShu Technology. All clips in this post were generated on viduq4.xyz with Vidu Q4 Preview.